Pandas Best Practices

What is Pandas?

Pandas is one of the most-used standard Python library when dealing with matrix-like transformable datasets which range from a simple tabular to a more complex structure dataset. It is an open-source library providing faster, flexible, and expressive mean for data manipulation and one of the essential to learn library in case you are getting in the data science field.
It mainly provides two well-suited data structures to multiple data type include Series and DataFrame. This article will get into how to use both of them and the case on which one may be helpful over the other in the following.
Installation
Pandas can be installed via pip from PyPI
|
|
or using the Anaconda or Miniconda environment,
|
|
Pandas components
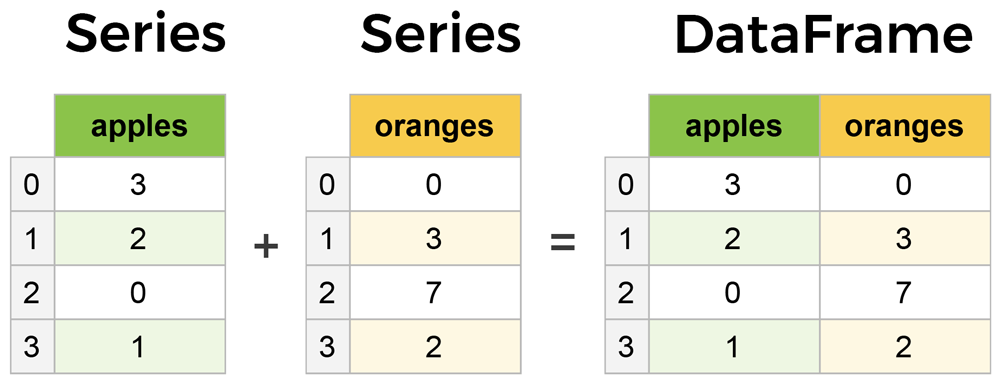
As mentioned earlier and to handle different types of datasets, pandas provides 2 data structures mainly wrapped over Numpy. Series is nothing but one dimension representation similar to the Numpy array but structured in the way it is explicitly associate an index with the values. Whereas DataFrame is a multi-dimensional array that can be thought of as a collection of series and its rows are also indexed by default unless it is explicitly done. They are pretty similar in terms of operations as one can apply almost the same manipulation to both of them.
Pandas main components
Dataset
The dataset being used in the following is either being created manually or loaded from Seaborn repository or the dataset Traffic and Pedestrian Stops by the Police in Rhode Island to make advanced operations. The choice lies in the fact that this dataset has multiple data types from which multiple scenarios can be derived.
Best practices
1. Importing necessary libraries
|
|
- For the full data analysis and visualization tasks, pandas is often incomplete and you need to have hands-on skills to other Python libraries like Numpy, Matplotlib or Seaborn but they are not mandatory. They are only used here to help us generating dataset or ploting important findings.
- In this article, additional information about the code is explained using Python comments.
2. Get to know the dataset
This is the first essential tasks that you would perform before getting started your analysis. Understanding the dataset may extend from knowing what’s inside, its content, its shape, the variable names, the variable datatypes, the ratio of null values, or going deeper to know the number of unique values of categorical variables, or even gather the descriptive statistics or the variable distribution. The following code snippet shows a few essential functions along with the must to know arguments to answer these questions.
|
|
df.read_csv() is one of the most common Pandas method designed specifically, but not limited to, to read a CSV data source. By default, CSV columns are separated by comma , as the name stands for but sometimes the data source comes with different column character separation such as ;, |,\tab. In such case, you can explicitly specify the separation character using the argument sep. Here, the argument parse_dates is used to format the date column to be of type datetime and index_col is the way to set some variable as the DataFrame index. You can pass a list of columns to this argument. Using usecols, you can define a set of columns in which you are about to perform the analysis.
df.head(3) shows the top 3 rows. You can specify as many rows as you want. Without specification, it will give the top 5 rows.
| stop_date | driver_gender | driver_age | violation | |
|---|---|---|---|---|
| 0 | 2005-01-02 | M | 20.0 | Speeding |
| 1 | 2005-01-18 | M | 40.0 | Speeding |
| 2 | 2005-01-23 | M | 33.0 | Speeding |
df.info() will trough us some important properties of the entire dataset. By specifying memory_usage='deep' it will introspect and return the exact amount of memory consumption.
|
|
dropna().describe() and dropna().select_dtypes().describe() are here used to get a quick summary of statistics by filtered columns by the data types. include=[np.number, np.datetime64, np.object] and select_dtypes(include=['number']) filter out columns by data types and by default the first one will include all the columns whereas the second will through an error as select_dtypes() required at least one parameter. The first doesn’t have any effect in this case as all the dataset dtypes are including in the list whereas the second only outputs column number of type number which is here driver_age_raw. To get a quick summary of columns datatypes grouped by columns, you can uncomment the code at the line 9. We can notice from the first output that some of the outputs are NaN and that is so because properties are data types dependent which means those that can apply to object data cannot apply to other data types and vice-versa.
| stop_date | driver_gender | driver_age_raw | violation | |
|---|---|---|---|---|
| count | 86405 | 86405 | 86405.000000 | 86405 |
| unique | 3767 | 2 | NaN | 6 |
| top | 2012-02-28 00:00:00 | M | NaN | Speeding |
| freq | 64 | 62895 | NaN | 48461 |
| first | 2005-01-02 00:00:00 | NaN | NaN | NaN |
| last | 2015-12-31 00:00:00 | NaN | NaN | NaN |
| mean | NaN | NaN | 1970.536080 | NaN |
| std | NaN | NaN | 110.514739 | NaN |
| min | NaN | NaN | 0.000000 | NaN |
| 25% | NaN | NaN | 1967.000000 | NaN |
| 50% | NaN | NaN | 1980.000000 | NaN |
| 75% | NaN | NaN | 1987.000000 | NaN |
| max | NaN | NaN | 8801.000000 | NaN |
| driver_age_raw | |
|---|---|
| count | 86414.000000 |
| mean | 1970.491228 |
| std | 110.914909 |
| min | 0.000000 |
| 25% | 1967.000000 |
| 50% | 1980.000000 |
| 75% | 1987.000000 |
| max | 8801.000000 |
3. Generate data sample and rename columns
Generating synthetic sample may help us in some situation like conducting an experiment, for instance, testing algorithms, making visualization to better understand changes over your experiment, and so on. There are several ways of generating samples for any purpose but the following made use of Pandas and Numpy to make it simple.
|
|
Here we have 2 different ways to create DataFrame and later renaming columns. The first will create a 2 columns and 2 rows DataFrame then renames the column names using the function rename().
| col_one | col_two | |
|---|---|---|
| 0 | 100 | 300 |
| 1 | 200 | 400 |
The second consists of constructing random samples and names columns after the list passed over the columns attribute then prefixes these names using the method add_prefix()
| X_a | X_b | X_c | X_d | X_e | |
|---|---|---|---|---|---|
| 0 | 0.226161 | 0.588816 | 0.335782 | 0.866124 | 0.274059 |
| 1 | 0.364500 | 0.021647 | 0.243754 | 0.628392 | 0.124118 |
| 2 | 0.507057 | 0.769180 | 0.364644 | 0.246468 | 0.716658 |
| 3 | 0.865142 | 0.201212 | 0.165379 | 0.397729 | 0.195590 |
4. Reverse row and column order
These are basic operations which consist of reversing the original order of the DataFrame row-wise or column-wise. Here, reset_index() is used to drop the old index and create a new one starting from 0. We can notice the difference between the first and the second output table.
|
|
police.loc[::-1, :].head(3)
| stop_date | driver_gender | driver_age_raw | violation | |
|---|---|---|---|---|
| 91740 | 2015-12-31 | M | 1959.0 | Speeding |
| 91739 | 2015-12-31 | M | 1993.0 | Speeding |
| 91738 | 2015-12-31 | M | 1992.0 | Moving violation |
police.loc[::-1, :].reset_index(drop=True).head(3)
| stop_date | driver_gender | driver_age_raw | violation | |
|---|---|---|---|---|
| 0 | 2015-12-31 | M | 1959.0 | Speeding |
| 1 | 2015-12-31 | M | 1993.0 | Speeding |
| 2 | 2015-12-31 | M | 1992.0 | Moving violation |
police.loc[:, ::-1].head(3)
| violation | driver_age_raw | driver_gender | stop_date | |
|---|---|---|---|---|
| 0 | Speeding | 1985.0 | M | 2005-01-02 |
| 1 | Speeding | 1965.0 | M | 2005-01-18 |
| 2 | Speeding | 1972.0 | M | 2005-01-23 |
5. Missing data
Missing data is a common problem that we encounter in our data analysis task. In the machine learning task, one can define missing values as missing information that would bring additional information if they are observed1. For that, investigating the missing information plays an important role in the data analysis problem. The following method displays the column-wise percentage of missing data followed by a pythonic way of getting rid of columns having only missing data followed by a tricky way to filter columns out based on the ratio of missing values.
|
|
police dataset
| stop_date | stop_time | county_name | driver_gender | driver_age_raw | driver_age | driver_race | violation_raw | violation | search_conducted | search_type | stop_outcome | is_arrested | stop_duration | drugs_related_stop | |
|---|---|---|---|---|---|---|---|---|---|---|---|---|---|---|---|
| 0 | 2005-01-02 | 01:55 | NaN | M | 1985.0 | 20.0 | White | Speeding | Speeding | False | NaN | Citation | False | 0-15 Min | False |
| 1 | 2005-01-18 | 08:15 | NaN | M | 1965.0 | 40.0 | White | Speeding | Speeding | False | NaN | Citation | False | 0-15 Min | False |
| 2 | 2005-01-23 | 23:15 | NaN | M | 1972.0 | 33.0 | White | Speeding | Speeding | False | NaN | Citation | False | 0-15 Min | False |
Missing data summary: missing
| features | missing % | |
|---|---|---|
| 0 | county_name | 100.00 |
| 1 | search_type | 96.52 |
| 2 | driver_age | 6.13 |
| 3 | driver_gender | 5.82 |
| 4 | driver_age_raw | 5.81 |
| 5 | driver_race | 5.81 |
| 6 | violation_raw | 5.81 |
| 7 | violation | 5.81 |
| 8 | stop_outcome | 5.81 |
| 9 | is_arrested | 5.81 |
| 10 | stop_duration | 5.81 |
| 11 | stop_date | 0.00 |
| 12 | stop_time | 0.00 |
| 13 | search_conducted | 0.00 |
| 14 | drugs_related_stop | 0.00 |
Keep columns contain at least 90% values: new_missing
Here we can notice that the features get reduced. The first two columns county_name and search_type have been removed as they held missing values beyond the defined ratio.
| features | missing % | |
|---|---|---|
| 0 | driver_age | 6.13 |
| 1 | driver_gender | 5.82 |
| 2 | driver_age_raw | 5.81 |
| 3 | driver_race | 5.81 |
| 4 | violation_raw | 5.81 |
| 5 | violation | 5.81 |
| 6 | stop_outcome | 5.81 |
| 7 | is_arrested | 5.81 |
| 8 | stop_duration | 5.81 |
| 9 | stop_date | 0.00 |
| 10 | stop_time | 0.00 |
| 11 | search_conducted | 0.00 |
| 12 | drugs_related_stop | 0.00 |
6. Split cells data
Splitting data is useful while dealing with object or category like data types. Let us assume that we are interested in splitting the stop_date into day, month, and year. There are at least two ways of doing so. The first and easiest approach is to treat the attribute stop_date as string and apply the transformation onto the string since there exists a couple of string manipulation helper on Python. But in our case, stop_date has already parsed to datetime64 while loading the dataset. By using the string helper functions, we are obliged to downcast again the field into str then applying split to the data afterward. This is computationally expensive when having millions of rows. The second approach comes into play to address this problem. In this, we treat the attribute as datetime64 and apply directly the transformation onto it.
|
|
The string parsing approach will produce the same output though there is a slight difference in the way how the data is being parsed in this case. The first method via astype() will parse the date while the data is loaded as datetime64 whereas the lambda() function will process right after the data has been loaded. Therefore, the first one will have the day string whereas the second will get the day along with the time which is a set of hour, minute, and second.
The DateTime parsing is an in-built Pandas feature that can only apply to columns of type datetime but is the most convenient way to extract date components.
| stop_date | stop_time | county_name | driver_gender | driver_age_raw | driver_age | driver_race | violation_raw | violation | search_conducted | search_type | stop_outcome | is_arrested | stop_duration | drugs_related_stop | year | month | day | |
|---|---|---|---|---|---|---|---|---|---|---|---|---|---|---|---|---|---|---|
| 0 | 2005-01-02 | 01:55 | NaN | M | 1985.0 | 20.0 | White | Speeding | Speeding | False | NaN | Citation | False | 0-15 Min | False | 2005 | 01 | 02 |
| 1 | 2005-01-18 | 08:15 | NaN | M | 1965.0 | 40.0 | White | Speeding | Speeding | False | NaN | Citation | False | 0-15 Min | False | 2005 | 01 | 18 |
| 2 | 2005-01-23 | 23:15 | NaN | M | 1972.0 | 33.0 | White | Speeding | Speeding | False | NaN | Citation | False | 0-15 Min | False | 2005 | 01 | 23 |
The same operation can easily be applied to object or category data types
|
|
The dataframe looks like
| fullname | address | |
|---|---|---|
| 0 | John Doe McArthur | Los Angeles, CA |
| 1 | Jane Smith McDonald | Washington, DC |
After splitting fullname by space, it will generate three fields
| 0 | 1 | 2 | |
|---|---|---|---|
| 0 | John | Doe | McArthur |
| 1 | Jane | Smith | McDonald |
After splitting fullname and address, the generated fields have now their own header names
| fullname | address | First | Middle | Last | City | State | |
|---|---|---|---|---|---|---|---|
| 0 | John Doe McArthur | Los Angeles, CA | John | Doe | McArthur | Los Angeles | CA |
| 1 | Jane Smith McDonald | Washington, DC | Jane | Smith | McDonald | Washington | DC |
7. Filter a dataframe
What makes a Pandas dataframe different from the other multi-dimensional data structures like Numpy is the way how it organizes the dataset to ease the manipulation task. Pandas makes use of index at every dimension of data in a Series or DataFrame. The index serves as label for each and every row and column to allow users accessing any specific set of cells. This makes the filtering tasks pretty straightforward. Indexes are, by default, of type integer unless it has explicitly preset.
There are multiple ways to access the indexes but two of them are common amongst the data science community including indexing operator which refers to the brackets, [] directly attached after a Series or DataFrame, and indexers that are in-built attributes of a Series and DataFrame like .iloc and .loc.
Alike to the previous approach, I will give some set of examples in the following from which you can easly derive for your own use case.
-
All about missing data handling, by Baijayanta Roy ↩︎